|
|
A brief summary of my MARBLE/marble Symposium experience, by Scott Leutenegger
July 11, 2005. Just back from an amazing experience. Imagine 50 sculptors in the woods, nestled against the crystal river in Marble Colorado, spending 8 days attending a few workshops and sculpting in Colorado Yule Marble. Too surreal to be true, perhaps, but it was real. I spent July 1 through July 9 at Marble/marble:
Note, I found Marble CO on a list of ghost towns, and that site shows some good photos and some history, but, it is not really a ghost town as it has a population of 105.
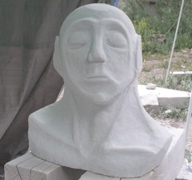
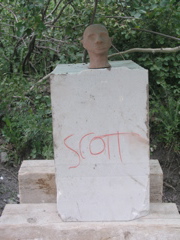
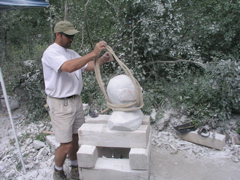
Many/most of the participants are professional artists and sculptors. I felt more than a bit out of my league as I was one of maybe three people who had never carved stone, but, the help I received from the instructors and other participants was amazing. As you see above, I succeeded in almost completing a bust. Below is a brief chronological summary showing the new sculptor in action.
I arrive about 5PM and with the help of instructor Scott Owens pick out camping and carving spots. Seems about half of the participants camp out at the site (free!) and the other half stay in local B&Bs. Whether it be an inkling I'll be buying more tools, or be it a natural urge to sleep for free, I decide to camp.
Speaking of tools, for the symposium the only thing I had to bring/buy is a set of 5 chisels and a hammer ($80) and a 100 foot 12 gauge extension cord ($60). The symposium itself is only $800 and that includes a big chunk of marble (400 - 500 pounds or so) worth about $400 and use of tools. Quite the awesome deal! Of course, I ended up spending another $400 on tools and more stone, but more about that later.
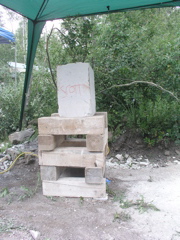
Long time participant and fine artist Jerry De La Cruz helps me prepare my carving spot and shows how to stack the "donnage" (a pile of 6x6 timbers) to hold the stone at the right height for carving. It is important to get it flat and level, you don't want a 500 pound stone falling on you, and to clear the work area around the donnage for easy access. Also, a shelter to block sun and rain is a good idea. Thanks Jerry.
Not enough time to pick out a stone tonight so instead I talk about my maquette (clay model) with Jerry and Scott who easily convince me I should add shoulders and a turn the head. Thanks Jerry and Scott, your suggestions made a HUGE difference!
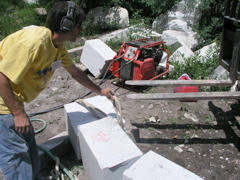
First thing is the opening workshop at 10AM. We are all greeted by Madeline Wiener, Scott Owens, and the third instructor Kathy Caricof After the initial greeting the regulars get to work and us first timers have our first workshop. They show how to use hand chisels and "body grinders". I am starting to get the clue that this art form is very power tool driven. My romantic notions of "tinking" on stone with hammer and chisel receive their first adjustment. We all use both a 7" pneumatic grinder and a big 9" electric grinder on a practice stone. The workshop supplies the tools, electricity,and air (they have two HUGE compressors to provide air to 60 carving sites!). To use the grinders effectively it is clear that the guards should be removed, but, that just does not sit right with me. So, I decide I want to try it with just hand tools.
Note, for a good overview of stone sculpting tools, a few techniques, and info about stone types, check out this web site:
With the help of Scott Owens I pick out a stone. Scott whacked a few stones with a chisel and crumbled the chips to show me a good stone versus a bad stone. I still have no idea how to tell myself, they all look like stones to me! Thankfully experts like Scott are around to help.
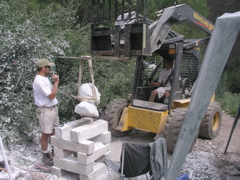
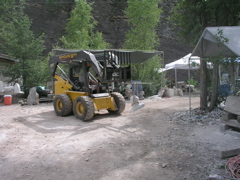
Once the stone was picked out it needs moved to my site. I would like to think I am in good enough shape to just tote that stone over to my site by myself, but I guess dead-lifting 275 pounds is not the same as carrying 500 pounds, so I let the pros move it. Program director and and sculptor Madeline Wiener drives the forklift and is assisted by her son artist Josh Wiener. Below are nine photos showing the empty carving spot prepared for the stone, some of the stones I could chose from, moving the stone to my site, and the stone at my site.

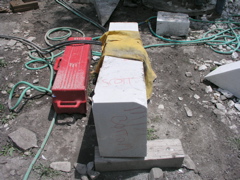
My site is ready for the stone |
Initial Clay Maquette |
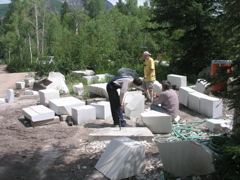
So many to choose from |
One of those three look promising |
This one! |
Josh straps it to the forklift |
Madeline concentrates on driving |
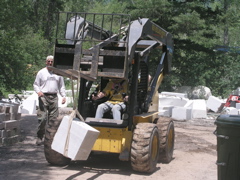
My stone on the move |
My stone is ready |
Okay, the stone is at my site. Now all days and times get blurry. I think I spent the rest of Saturday just playing with hand tools and a bit of time using the air hammer. Scott Owens came over and showed me how to use the air hammer two days before the workshop on air hammers. Thanks Scott.
So, I have a huge chunk of stone and a little clay maquette. How does one go about making the stone look like the maquette? I decide I need some confidence building, and I am anxious to try to make a face, so, I decide to make a little test face in a corner that I know will be cut off. Below is the test face (along with my face!) Later, I cut off the test face (which I have saved as my "first sculpture").
How to make it look something like the maquette? |

First a practice face in the corner with chisels |
I cut off the practice face |
Start of a big nose |
Start rounding the head |

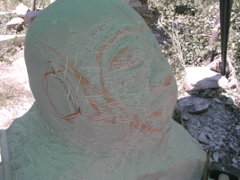
Another view |
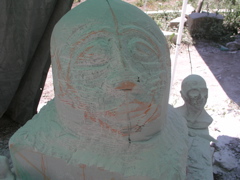
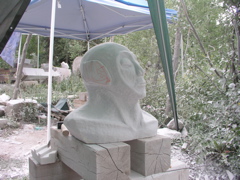
An emerging face |
Another view |
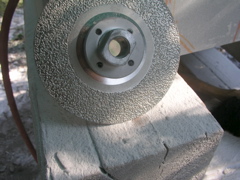
I give in and buy a diamond blade |
Today we go on a tour of the marble quarry. The quarry was shut down from 1940 until 1995. Below are a few photos of the mine. It was pretty cool to see where the marble I am carving came from. The workers cut out absurdly large chunks of marble, some weighing up to 200,000 pounds! Then they stick them on a truck and bring them down a step dirt road, brakes burning. I sure would not want to be driving one of those trucks down the hill. The slogan on the marble/marble T-shirts is "from the heart", which is in reference to getting the marble at the heart. Scott Owen's relayed to me that some old Italian guy that used to work at the mine and would come down to the marble/marble grounds and say "your getting it from the heart", hence, the slogan. The person that runs the mine says they are looking for some employees, $16 per hour. Never mind that during the winter the temperature inside the mine gets down to minus 20 degrees due to the huge openings. Any takers?
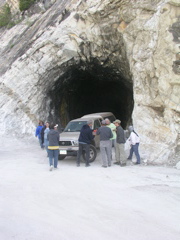
Mine entrance |
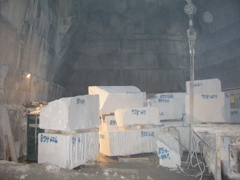
Huge marble blocks in the mine |
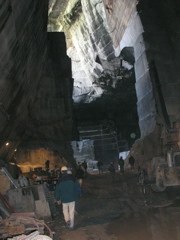
More of the mine |
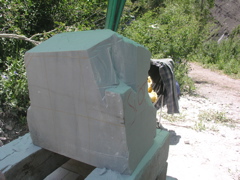
Okay, enough about mines, I am sure you want to know more about my sculpture. Remember that grinding disk I bought (above)? With it I made a LOT more progress Wednesday through Friday. The next six photos show a three day progression. I think it is amazing how much the piece changed when I cut off the corners of the bottom block and got some neck showing.
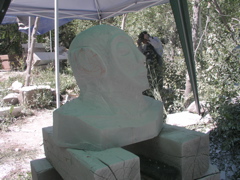
Looking face-like |
Getting rid of "blocky" base |
Start to add some neck |
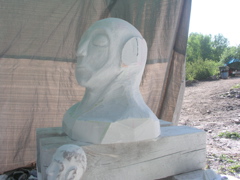
More neck |
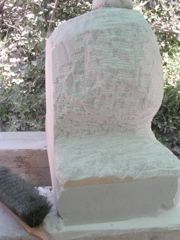
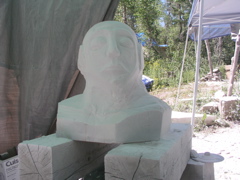
Final state for workshop |
Another view |
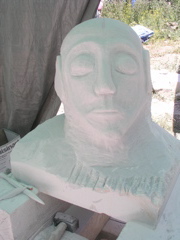
I did a bit more work on the piece this AM, but most of the day was spent loading up my campsite, taking down my carving site, and playing with a small piece of marble to experiment with sanding/finishing. Once I was really ready to leave I needed to get my bust (still nameless, perhaps "Sid" for Siddhartha? He looks so peaceful.) into my car. Josh and Petro retrieved the piece from my site and put it into my car. I am still wondering if they really needed to hang Sid, seemed too old-west for my taste, and I am sure he was innocent.
Petro hanging my sculpture for transport |
Guiding UP |
Enroute to my car |
Of course as I left I could not help picking up a few smaller pieces of stone for future projects. Three different types of stone to experiment with, the largest a 77 pound chunk of Norwegian Rose Marble. One of the long time participants, Myles Schacter, is also a tool and stone vendor, so it was from him that I bought the three stones. You can check out his web site at 2Sculpt .
Did I mention $400 in tools and stone? The stone was only about $200. The tools I bought were the grinding disk, two smaller grinding disks to go into a die grinder, and a few chisels. I still need to buy an angle grinder and a die grinder. I am sure these tools will bring great joy to my suburban neighborhood, but hey, much more useful than a constantly barking dog....
So where is Sid now? Sitting in my garage on saw horses. As I drive up and hit the garage door opener I am greeted by Sid. Still much to do. I have not touched the ears or eyes yet. My original plan was to do a grotesque and just have deep eye-sockets, so I might still do that. My original ears were to be twisted and pointy, not sure about that anymore. The neck is still huge, I mean this guy could play center for any NFL team and more. So, I might make the neck a bit thinner yet. And, then there is the question of finishing, how polished do I want to go? I can make is smooth and sparkly if I want, not sure. Then there is the question of where to work. I can do it in my garage, but the fine marble dust is quite messy and will invade my neglected woodworking tools. I could put it on a hydraulic lift on wheels and do it in my driveway, but will the neighbors freak out about the noise of grinders and chisels? I'll figure it out soon, but for now I just love driving home an seeing Sid.